Now, the problem with nail foils: they can't have a topcoat. It ruins them; it takes away the shine and they start to kind of smudge. So of course they don't last long. I literally rubbed mine off as soon as I got my pictures. So the lesson here is that I think the glue is extremely important!!! I'm going to order some and try this out again and hopefully it'll stay. That way even without a topcoat it won't rub off. Hopefully. But lets be honest, I probably won't order the glue any time soon. Until then, I'll just use the foils the day of rather than a day or night before. I want to save them for special occasions and for now I only have gold, brown, and silver.
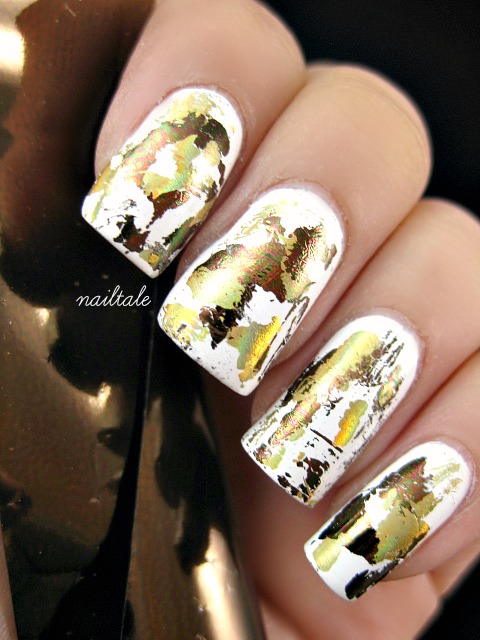
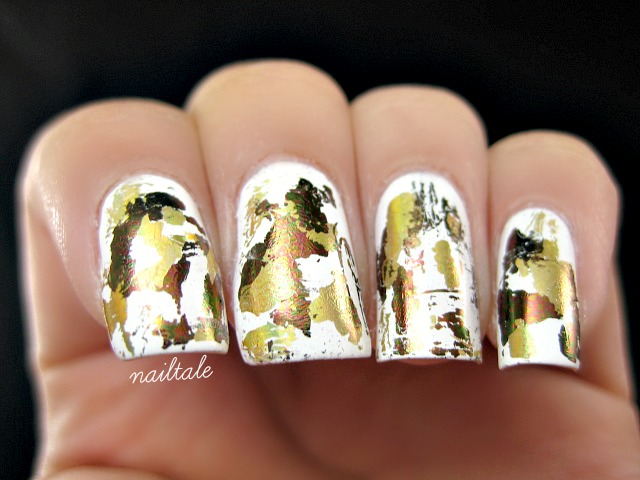
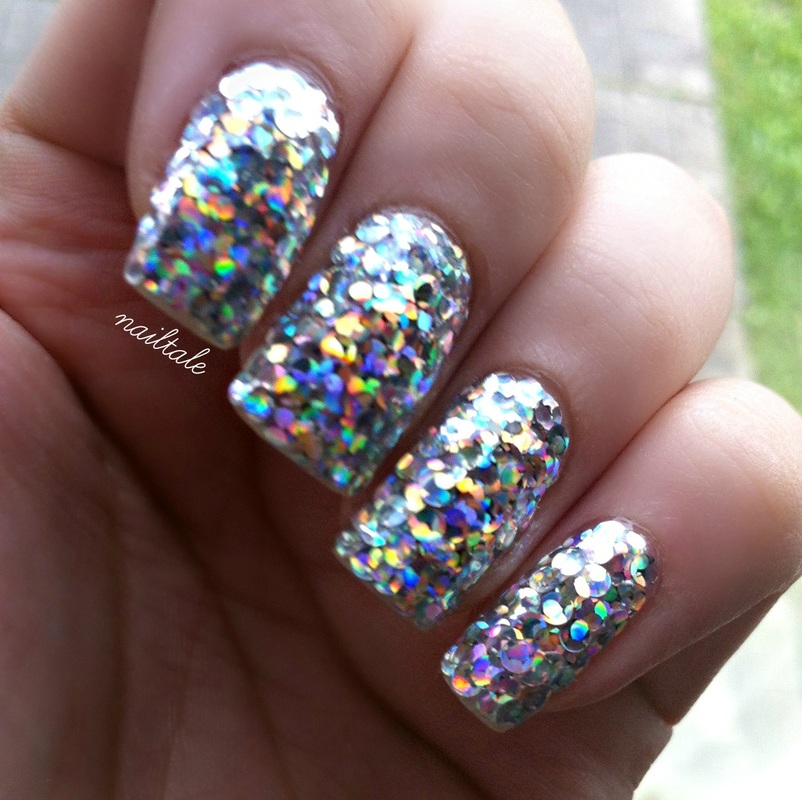
Weeks and weeks and weeks ago I ordered a few rolls of nail foils from Born Pretty Store. After getting them I looked up a video to learn how to do them but it said that I needed the special glue for them to work, and of course I didn't have it. By the way, this kind of stuff happens to me a lot! I always order things without researching thoroughly and then they just sit in my drawers unused because I'm missing some important piece. Same thing happened with these foils, I got lazy and didn't order any glue but tonight I wanted to try them out so I researched and found that you can use them without the glue! Hurray! I looove how they came out!! I will definitely be ordering more colours now that I know how to use them. Basically you put on your base colour, wait for it to dry but not too dry (until your nails are tacky; I waited too long on a couple of nails and although it made the foil harder to put on, it still worked), and then rub the foil on (shiny/pretty side up). Now, the problem with nail foils: they can't have a topcoat. It ruins them; it takes away the shine and they start to kind of smudge. So of course they don't last long. I literally rubbed mine off as soon as I got my pictures. So the lesson here is that I think the glue is extremely important!!! I'm going to order some and try this out again and hopefully it'll stay. That way even without a topcoat it won't rub off. Hopefully. But lets be honest, I probably won't order the glue any time soon. Until then, I'll just use the foils the day of rather than a day or night before. I want to save them for special occasions and for now I only have gold, brown, and silver.
0 Comments
A England is fast becoming one of my top favourite brands. Since it costs more than the average polish I can't get as many as I would like so I pick a couple of hard-to-ignore shades every now and then. One of these was Sleeping Palace. The thing with this shade is that the swatches online all show a different variation of the colour; you never really know the true one until the bottle is in your hands. Well, when mine was finally in my hands a couple of days after I ordered it (thanks nailpolishcanada!), it turned out I already had a very similar shade by the name of Misty Blush by Layla. There are enough differences between the two that I don't regret either purchase but I get so frustrated when I end up buying a colour based on a swatch that was off the mark; I hope for the best when really, I should've believed in that one swatch I didn't like because usually, that's the true shade. I need to follow my gut more often.
Anyway, I find that the Layla polish has much more holographic qualities whereas Sleeping Palace is darker and less holographic. Both are beautiful shades so it depends on what you're looking for. If you like eye-catching, flashy nails then go for Misty Blush. If you want just the unique deep purple shade with a hint of flash then Sleeping Palace might work better. I did a mani with MB as the base with SP stripes. It looked cool in person but my camera couldn't capture the stripes too well. I flashed the mani up with a beautiful bow from Born Pretty Store. I used to hesitate from wearing big bows and nails jewels but the ones I got from BPS are actually curved so they sat perfectly against my nail, it was quite a pleasant surprise! How fun are splatter nails?? Although they are extremely messy (I can officially say I know the taste of nail polish because of this design), they're awesome because they can be used for any fun holiday or event. I did splatter nails for Dexter's series finale (insert weeping face) and it's one of my favourites so far. I wish I could do a tutorial but honestly, the way I do them is just impossible to capture on camera. Especially because there's a 99% chance that I'd get more polish on the camera than my nails. I can try to explain it though! I basically just pour a blob of each polish onto a paper, I use a really thin drinking straw (available at dollar stores like Dollarama), dip it into the polish and just flick, flack, fling EVERYWHERE. I find it easier if I make sure a bit of polish gets into the straw. I know some tutorials say you can blow through the straw and that does give amazing results but it's never worked for me, I dunno what I'm doing wrong but I almost passed out last time I tried LOL. Anywhoooo, sorry for the lack of tutorial for these. As always, I did both matte and glossy. I think I like glossy this time! I have a little embarrassing confession to make!! When I posted abundant pictures of my bangin' glitter nails, a bunch of people said things along the lines of, "ooooh guurrrl, those are gon' be a b*tch to take off!" I proudly said to my IG followers, "It ain't no thang! I have the foil method, that shiz never fails." I think you can see where I'm going with this...it failed. For the first time everrrr. 15 minutes after I wrapped my babies up (see my tutorials page for the method), I eagerly slipped off the foils and saw that it had made no difference. At. All. Okay, it DID soften up the polish and made the next hour a little less excruciating; this hour was spent using the edge of a cuticle trimmer to peel off each piece of glitter individually...yep the same pieces I had put on so lovingly were now sticking to me like glue. I almost had the thought of never ever ever ever ever ever doing this to myself again. But the result is too stunning not to. SO what we've learned is that the foil method will work for anything except OPI I Snow You Love Me. Which kinda sucks because it's soooooo prettyyyyyyy. Oh well, we all know that if something's high maintenance, it's usually worth it =D
I finally tried my hand at glitter placement! And loved every second of it!!!! I used OPI I Snow You Love Me because, although I have glitters that are very similar to this one, the pieces are definitely larger than the rest of the brands I have; this made it much easier to place individual pieces to cover the whole nail. I can't even begin to describe the beauty of it! Lately I've been doing my nails very often, I seem to get bored easily for some reason, but now I want to keep this on for daaaays! It's holding up pretty well too so hopefully that'll be possible. I used two coats of Seche Vite to seal it in and it's very smooth even though the placement is uneven in some spots.
It took an hour and a half to do each hand; I don't know if that's standard or if I just take a long time haha. But seriously it was worth it. If you also follow me on Instagram (@nailtale) then you've probably already been bombarded with pictures and videos of these nails. I thought it would annoy many of my followers but I've actually gotten an amazing response! I think this polish is one of the best to try glitter placement with since it has larger pieces. I will definitely be doing these for my future birthdays because it's so stunning, it's like having disco balls for nails!! I've already ordered a back up since I've already used a third of the bottle for this one use. |
AuthorJust another polish fiend =) ArchivesCategories |